This year.. I will make him a document (A4 size) bag to replace his old one (the one I made to accomodate his laptop at first but he use it to keep his car document..wallet and keys instead).
The design is pretty simple. It's a bag for male after all. I can't put ruffles or attach flower for instance. Has to be something practical!
so I would like to share the tutorial aswell.. oh dear I've been wanting to share something with you but hell no where I put my mind these days ;)
What you need to do :
- Pattern : that would be a rectangular. Mine is 37cmx32cm (Includes 1cm seam allowance). You may want to measure your own laptop or document..or anything. Cut 2 for outer fabric (I use denim/stiff fabric/thick fabric). Cut another 2 for lining (I use unknown fabric).
If you want to put the flap like mine... you need to make another rectangular.. mine size 29cmx12cm (includes 1cm seam allowance) . Cut curve the corner with scissor for nice look.
You need to sew these two together..leave the top edge completely open/un sew... for turning.
- Pockets : for outside and inside pockets I make another rectangular. Mine size 32cmx22cm Includes 1cm seam allowance.
You need to attach the pockets to the outer fabric and lining before you sew the fabric together.
In the middle.. I made two lines of top stitches for a pen.
Same method works for outer/denim exterior pocket.
- Sew together the outer/denim fabric (right side facing each other).. same for the lining but leave 10cm open for the turning.

- Long straps : Mine size 11cmx160cm Includes 1cm seam allowance. Cut it parallel with the grain of your fabric. Then you fold them in half - lengthwise- sew along the way (right side facing right side). After.. turn the fabric inside-out. Now you have a neat -clean long straps. Iron it... and top stitch all the way (you can skip this step if you want). You can use "ready made" straps. Any straps can do.
- Attach the strap to the side of the bag with basting stitch. 

NOW IS THE TRICKY PART :
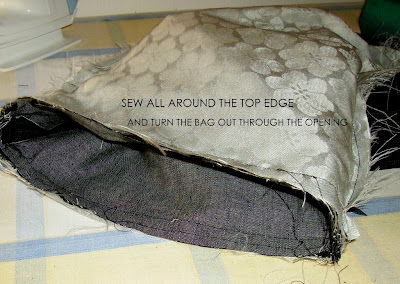
- Insert the outer bag into the lining (rightside facing each other) .. sew the top edge all around.
 .. sew the top edge all around.
- Enjoy the bag ;)
NOTE : If by chance you use this tutorial.. I would like to see your version ;)..Happy crafting!


No comments:
Post a Comment